Introduction
I just recently started learning Rust. Though, there are many different ways to learn and get familiar with it like reading The Book, building projects etc. I thought of daily solving Leetcode problems to acquire a good command on this language.
As I have started doing it, I believe this is also a good way to practice Rust. However, the beginning is indeed challenging, and the first hurdle you face is setting up the project.
It's not just about setting up the Rust project, but also about arranging the files within the project, grouping them by topic. This way, you can come back to the solution of a problem and easily find the exact file for it because you know the problem is based on a specific DSA topic.
Arranging a Java Project
Previously, I used to practice DSA and solve Leetcode problems in Java. Setting up the project for Java is very easy with IntelliJ IDE. You just need to click on New Project, select the path and the language, and boom—your project is ready. Now, I have a specific way of organizing my Java project for Leetcode.
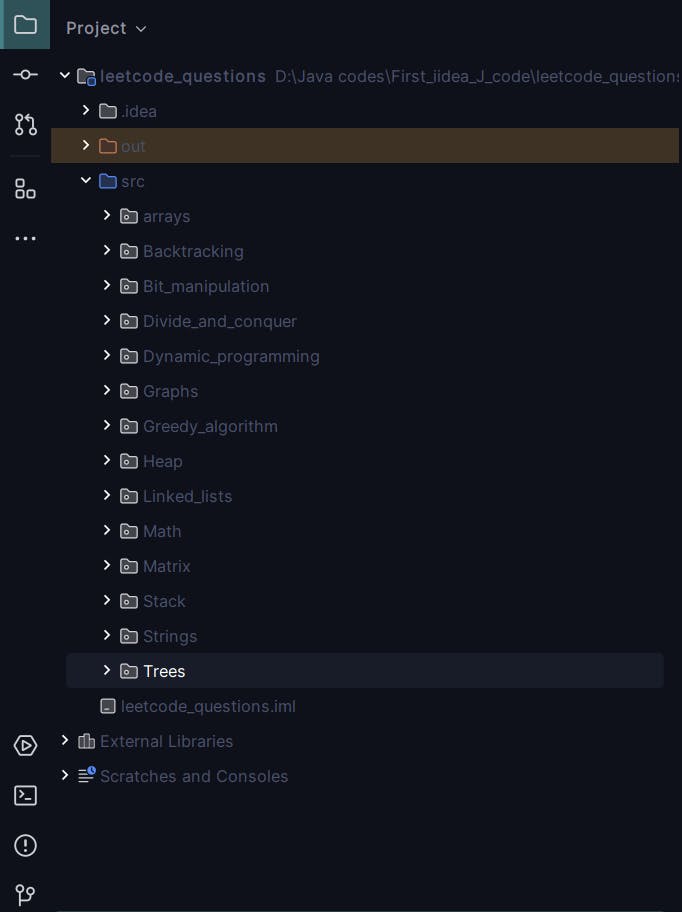
When you create a new Java project in IntelliJ, you have a src directory, inside, you get a main class (Java class). So, I deleted this main class and created different packages for different topics—arrays, strings, math, linked lists, trees, and so on, as you can see in the above snapshot. For me, this was a suitable way of arranging my code. Whenever I am practicing any topic, I can hop back to this well-arranged project, find that problem under a certain topic, read the code for revision, or try to optimize previously written solutions.
Differences that you face in Rust
As for now there's a recent release of JetBrains IDE called Rust Rover for Rust but its still in Beta testing stage. There's also a rust plugin for IntelliJ. This blog particularly focuses setting up the project for VS code.
Now, doing the same thing for a Rust project is challenging. When you create a new Rust project using cargo new project_name (snake case expected), the created project has only one entry point, which is main.rs residing in the src folder inside the project. What this simply means is that even if you create another Rust file, write some code in it, you cannot run or debug it using the cargo run command. This command only runs the main.rs file in the src directory. This means that, irrespective of other .rs files you have in the src directory, if you haven't imported them properly in your main.rs, the code in them will not be executed, rendering them useless.
Just arranging the Rust files without creating a project
Now, just for the sake of arranging your code, you can have different topic directories inside your main project directory. You can create different files for various problems. For example, in the leetcode_solutions directory, I have subdirectories like arrays, strings, etc., and in each directory, there are different files. For instance, the arrays directory will have various files for problems related to arrays. You can use the ructc file_name command to compile these files and run them using the executables generated after compiling. The only issue with this approach is that you won't be able to debug the code. I am referring to the method mentioned in this part of The Book. https://doc.rust-lang.org/book/ch01-02-hello-world.html.
Topic wise arrangements of Leetcode solutions
Now, let's get to the actual point. This blog assumes that you already have VS Code and Rust installed and set up on your PC. When you create a new Rust project using the cargo new command, you get the following folder structure with an initiated Git repository.
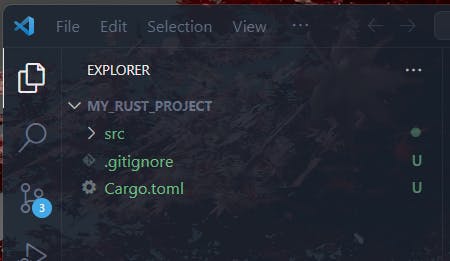
The src file has main.rs file having a simple Hello world! program in it.
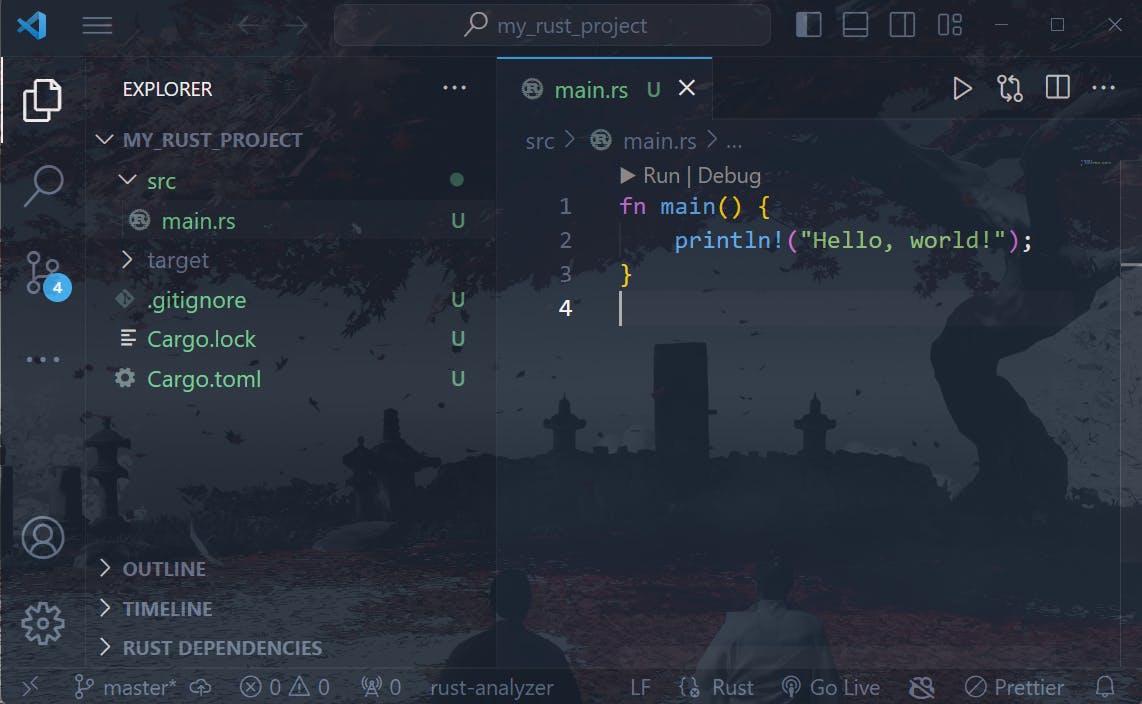
Of course we will delete this Hello World! program in the main.rs file (not the main.rs file).
Now, to arrange the problem files in separate topic wise directories we can have a following folder structure.
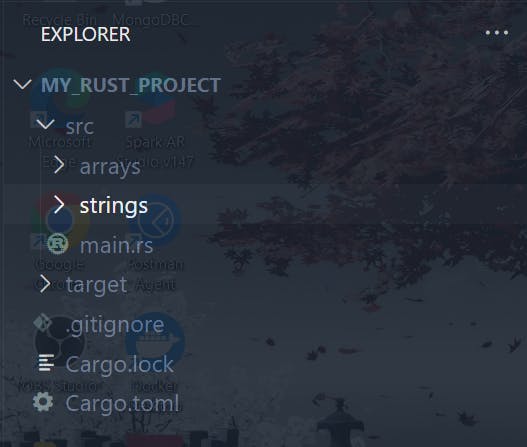
Inside the src folder, as you can see above, there are different directories for each topic, such as a directory for arrays and another for strings. In each topic directory, there must be a mod.rs file along with the problem files. Inside the mod.rs file, all the problem files in the topic directories should be mentioned as modules, as shown in the snapshot below. Ensure to use the pub keyword to make those modules public so that they will be accessible outside of these modules.
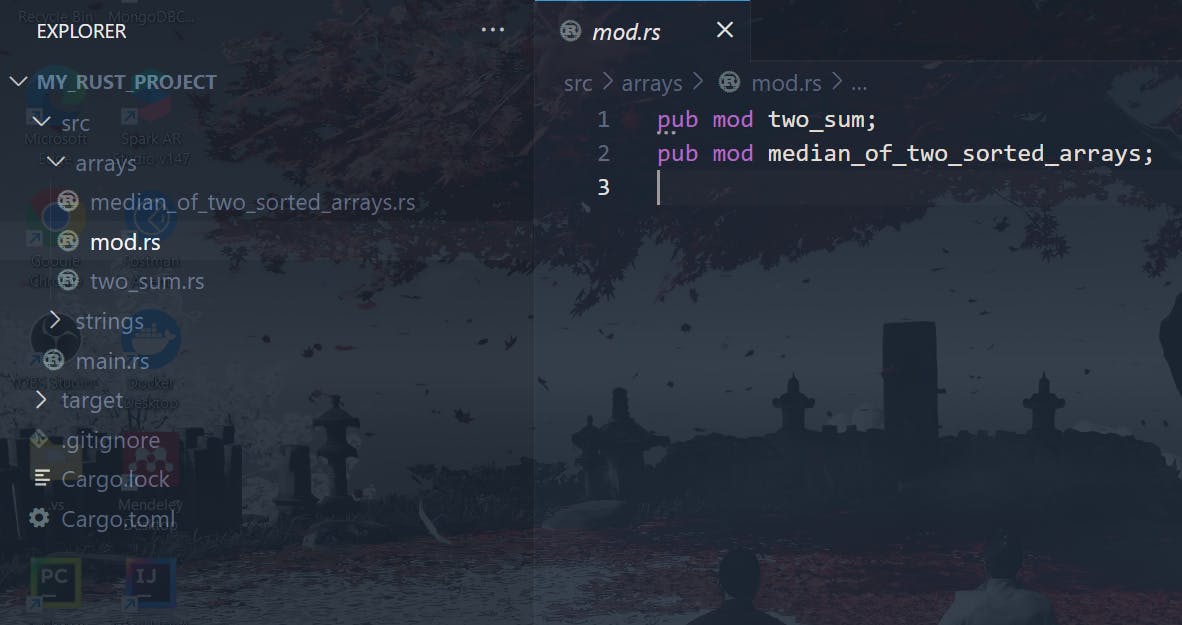
Now these problem-files are visible to main.rs file in the form of modules exported by mod.rs file in each topic-directories.
Now, in the main.rs file, you can import these problem files from the topic directories using the mod keyword and mentioning the directory name. Calling the functions in the problem files inside main.rs can be done in the following way;
mod arrays;

fn main() {
    arrays::two_sum::two_sum_run();
}
This is the two_sum.rs problem-file having two_sum_run() public function which is imported above in main.rs file.
use std::collections::HashMap;

pub fn two_sum_run(){
    let numbers: Vec<i32> = vec![2,7,11,15];
    let target:i32 = 9;

    println!("ANS: {:?}", two_sum(numbers, target))
}

pub fn two_sum(numbers: Vec<i32>, target: i32) -> Vec<i32> {
    let mut checked_elements = HashMap::new();

    for (index, current_element) in numbers.iter().enumerate() {
        let needed_element = target - current_element;

        if checked_elements.contains_key(&needed_element) {
            return vec![checked_elements[&needed_element], index as i32];
        }

        checked_elements.insert(current_element, index as i32);
    }

    return Vec::new();
}
You can now mention all the topic directories at the top of the main.rs file and call the functions in the problem-files inside main.rs under the main function.
mod arrays;
mod strings;

fn main() {
    arrays::two_sum::two_sum_run();
    arrays::median_of_two_sorted_arrays::median_of_two_sorted_array_run();

    strings::longest_substring_without_repeating_characters::longest_substring_without_repeating_characters_run();
    strings::longest_palindromic_substring::longest_palindromic_substring_run();
}
This is all. I hope this blog was helpful. Now, you can suitably use debug tool in VS code configuring the launch.json file appropriately.
Thank you for reading! 😄
